Carving Knives a History

Our History
The Knotts knives story begins in 1968, when Cheston Knotts, an avid hobbyist and skilled Crafts-man, became interested in carving. As he developed his
carving skills, he found that the pocketknife he was using wasn’t very comfortable and the tools he would like to have were not available.
Bringing his resource to bear on the problem, he developed blade shapes that suited his needs, made from steel that held a fine edge and was easy to sharpen. He fastened the superior blades into walnut handles that fit the hand and are pleasing to the eye.
Site Content
General Carving Knives

His instructor, on seeing his prototype, became our first customer. He, in turn, showed his new tools to other carvers, and the family phone began to ring. It wasn’t long before a fledgling mail-order business had started and “Knotts Knives” was born. We thought the first couple hundred of the knives had probably saturated the worlds market demand!
In 1987, Cousin Allan took over the management of the company to allow Uncle Chet and Aunt Mary to retire.
In 1997, John and Cinda Walls, owners of “Cousins”, a wood carving supply business, purchased “Knotts Knives” from Allan Knotts, John’s Cousin.
As the owners, “Cousins” is totally committed to excellence in craftsmanship, using only the time proven techniques of hand grinding, polishing and sharpening, “Knotts Knives” have become a fabled standard of woodcarving tools.
General Carving Knives
General Carving Knives
General carving knives are used for the bulk of work on most pieces. These tools have blades that are 1 5/8” to 2” long. Many carvers use these knives for everything from “roughing out” to eyelashes! The #6 knife has, for many years, been our most popular tool. The #2 is a shorter version of this sheepfoot shape. The #9 blade with the arched tip makes concave carving easier. The #5 blade is the same cutting edge with a relieved back to facilitate undercutting in tight spots. The #7 spey blade works well for deep concave areas and, turned on its side, works as a modified chisel. #11A offers a tapered blade-excellent for working tight radius areas.
Heavy Removal Tools
Heavy Removal Tools
Heavy removal tools unlock your carving from a new block. These larger knives also do general and detail work on large decoys and sculpture pieces. The #1, #1A, #1B and #1C drawknives are two-fisted tools for quickly shaping a block. Their sizes are perfect for most decoys and moderate size sculptures. The #10A knife is a shortened version of the filleting knife. This knife has been extremely popular as an overall carving tool among Chesapeake Bay area carvers. The #E2 and #E3 kniveshave become extremely popular with carvers who want heft, control and rigidity in a “razor-type” knife.
Site Content
Detailing Tools
Detailing Tools
Detailing tools articulate the finer features of your carving. Whether it’s delineating feathers on a bird, splitting barbs, or carving facial features on human sculpture, within this group you’ll find the tools for the job. The #4 knife has been our most popular detailer over the years. It offers good size, control and shape for a broad variety of uses. #11AA was designed originally as a “barb splitter”, but has proved useful in getting into all sorts of tight spots. The #8 and #8A are super tools for general carving on small work or detailing large pieces. The #M1,#M2,#M3 and #M4 are designed for carvers who need surgical precision in very fine detail work. The handle can be used in a palm grip with the thumb or hooked forefinger resting in the depression behind the blade, or held in a pen grip with the tip of the index finger providing blade control.
Special Tools
Detailing Tools
Special tools : The #B1 and #B2 have a curved sweep for Tupelo carving. The #6A was added as a smaller version of the Tupelo sweep. The #3 bent knife is made in right and left hand versions. The right hand version (#3R) works on the pull stroke for a right hander. The left- hand version (#3L) will cut on the push stroke for a right- handed carver, and vice-versa for southpaws. This is an excellent hollowing tool and is also useful for cutting eye channels on waterfowl, etc. Our offset chisels are palm held tools for relief work, undercutting, veining, etc. The #12 is a straightedge tool, #13 is available in L & R skew models. The #14, 5/8”and #15, 1” Fishtail skews are palm held tools used for smoothing large areas.
Sharpening Instruction:
Sharpening Instruction:
I can’t stress to you enough the importance of maintaining constant sharpness of your “Knotts Knives”. We recommend the following sharpening method, which will keep your knife at the zenith of sharpness if you will simply do it every half hour or so as your carve. It’s real simple! On our leather strop (#16 and #18), add a couple of drops of light oil (Neatsfoot, honing oil, etc.) or a quick shot of spray lubricant (W-D40,etc.) and rub it in a bit on the rough side of our leather strop. Sprinkle on a small amount of Aluminum Oxide powder (#17) and spread lightly. As your strop gets broken in you won’t need to do this very often.
Site Content
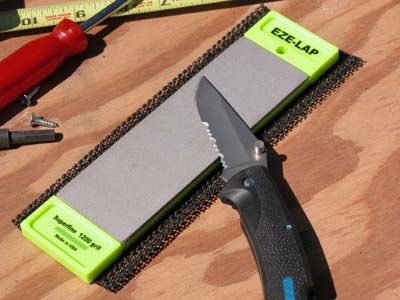
Now pay attention, here’s the important part! Hold your knife flat on the strop and pull with the sharp edge trailing. You don’t need to use a great deal of muscle. You do need to be sure that the cutting edge is pressed down enough to make contact. Keep the side of the knife flat at all times. Some people have a tendency to lift or roll the blade at the end of each stroke. A half dozen passes each way every 20 or 30 minutes as you work, (about every time you want to step back and see what you’ve done on your piece) will keep that razor edge. If your knives have gotten beyond this kind of treatment, use the same technique on a fine diamond stone, or a good flat natural or manmade stone of your choice, or a piece of medium fine (#180-240) silicon carbide or aluminum oxide abrasive paper held on a good flat surface. Let me repeat – the operative word is flat!
There are lots of knife sharpening devices on the market. We recommend the leather strop because it will give you years more blade life, it’s inexpensive and it’s easy. Three reasons that can’t be beat!